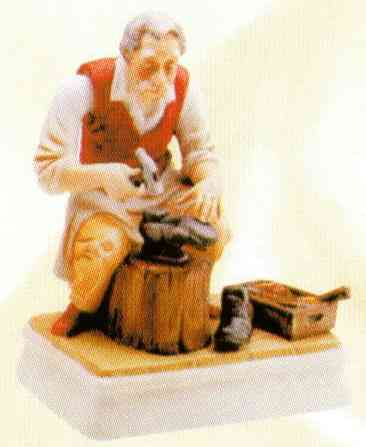
The name for a shoemaker originally was cordwainer. It was seldom used after 1700, but still appears in dictionaries and the guild of shoemakers in England retains the name of The Cordwainers Company. Historically, the word cobbler was used to refer to someone who repaired shoes. The image of the old shoemaker (left) would predate the 19th century.
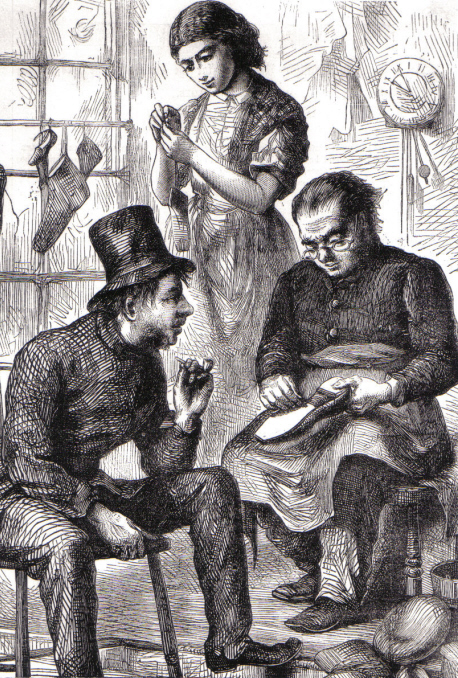
Shoemaking has been called the gentle craft because it does not require much violent, physical exertion. The shoemaker did most of his work seated at his bench and with his hands. The basic equipment he needed was a shoemaker's bench and tools. These could be combined in a bench with a tool box that itinerant craftsmen could haul on a cart to their customers. Or, a shoemaker could work out of a small room, for example in his house. It's doubtful that John Wighton worked as an itinerant shoemaker in Dundee, but he may have worked in a retail store, perhaps in a back room after first meeting with the customer to take measurements. He might also have supplied one or more commercial shops by working from his home. Belgium shoemakers commonly worked from their home, so perhaps this was also done in Scotland. John Wighton's home in the middle of the commercial part of Dundee would have made that feasible. If so, it's also possible that John's wife Ann assisted him by doing the sewing as shown in the image to the right. In the image, the shoemaker is attaching the sole to a shoe and his wife is sewing the uppers. (Note: if Ann did help with the sewing, this might explain why she went blind; reportedly, this was a common health problem for seamstresses.)
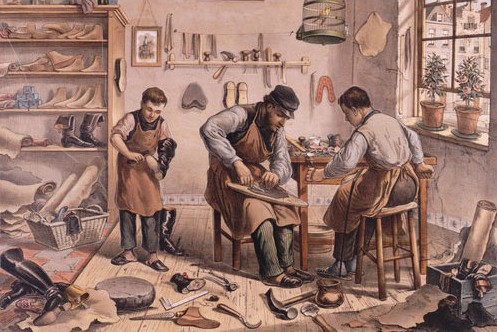
The print to the left is from a Belgium shoemaker's workshop from the 19th century. The maker (far right) is joining together the different parts of the shoe. The clicker (center) is cutting out the different parts of the shoe. He was called a clicker because of the noise his knife made as it cut through the leather and hit the board underneath. The boy would be the apprentice. Other things to note in the picture: The work bench appears to be just a sturdy table; there was a shelf behind the bench for some of his tools (hammer and awl are visible). Other tools visible nearby on the floor were the large hammer that was used to toughen the leather and make it last longer and a lapstone which was a large stone that was flat on one side that the shoemaker would put on his knees to act as an anvil as he hammered the leather. Visible on the shelves is a collection of wooden, foot-shaped models that were called lasts. These served as the mould on which the shoes were made. Apparently, many Belgium shoemakers kept caged birds for company. In some workshops, shoemakers were banned from carrying out noisy work when chicks were hatching.
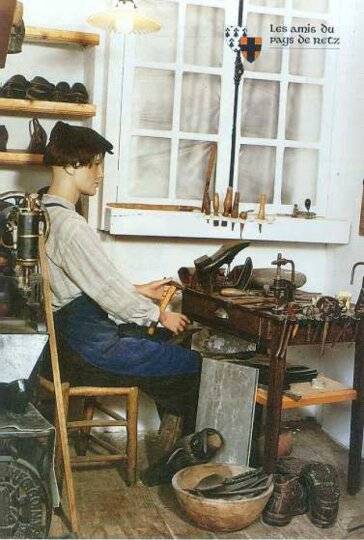
Here's another representation of a shoemaker's workshop to the right. In this case, the shoemaker was French. (This particular shoemaker was known for working long hours without getting tired, but his stoic silence made for very poor customer relations.) Note that this workbench allowed the shoemaker to keep his tools close by, either on the side of the bench or on the shelf underneath. The large stone sitting at the back, left corner of the table was used for beating the leather. Awls can be seen on the window ledge and the shoemaker has a hammer in his hands. Other common tools and materials that a shoemaker would use, but which I cannot pick out in the picture, are: marking wheels, sole knives, pliers, pincers, an iron, lengths of waxed hemp or linen cord and nails. Barely visible between his knees is a little shoemaker's block used for sewing. The grey rectangular block next to the shoemaker's right knee is covered in zinc and is used for trimming leather.
On the workbench directly in front of the shoemaker, you can see the shoe that he is currently working on. It is placed upside down on a lasting jack which was a cast iron article that was fastened to the bench to support the last which is the mould of the shoe around which the new shoe is created. The lasting jack held the last in a more secure way than the shoemaker's knees could. In this image, you can't see the last.
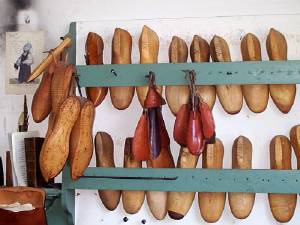
To the left, wooden lasts are stored in a shoemaker's workshop. The last was a mold around which the shoemaker fashioned the shoe. Carved from wood, the last would be made by first measuring the customer's feet at several particular points, then the last would be whittled out of a block of wood until the contours matched the measurements taken from the customer's feet. In the 18th century, both the left and the right shoe would be made from a single last. However, by the 19th century, shoemakers were mating left and right shoes, making them slightly different from the squared-toe design of previous years. (Children's shoes continued to be unmated.) The pair of lasts would be marked with the customer's name and often would be used for the life of the customer. If the customer's feet increased size or changed shape, the wooden last could be adjusted by attaching a piece of leather to the wood where necessary.
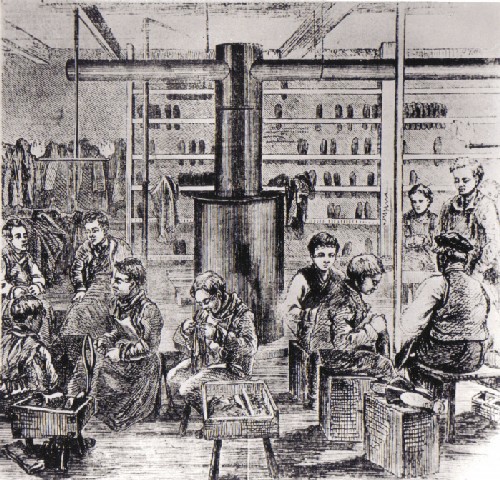
To the right is an 1850 image of orphan boys learning to make shoes. Here's the process they would have learned. The shoemaker started out by attaching the last to the lasting jack so that the shoe would be upside down. He then stretched a piece of thin leather, called the upper over the last with a special type of pliers or pincers and tacked the leather temporarily to the wooden last. The upper would actually be made in two pieces, the one forming the vamp that covered the toe and instep and ended in the tongue, the other covering the heel and sides and ending in two straps.
The sole was made out of thick leather that was soaked overnight in a bucket of water to soften it. The shoemaker would place the softened leather on a lapstone and hammer it with a broad-headed hammer to further soften it up and make it take on the contour he wanted. Glue would be used to temporarily fasten the sole to the upper so that the shoemaker could sew the two leather pieces together. (He made the upper slightly bigger than needed so that it had extra edges that could be used to sew to the sole.) Prior to sewing, the shoemaker would pass a marking wheel over the leather to mark the spots where the needle had to pass through and he would use an awl to bore the actual hole. He used a hog bristle for a needle and thread that was made from flax and which was coated with wax or pitch for greater ease in penetrating through the leather.
Next, the shoemaker would create a heel by nailing several pieces of shaped sole leather to the sole. Any protruding edges would be trimmed with a sole knife. The wooden last was then unfastened from the lasting jack and a special cross-handled hook was employed to grasp the wooden last and pull it out of the shoe. The last step in the production process was to burnish the edge of the sole and the heel with a curved iron heated over a flame. Dress shoes would have their uppers blacked and waxed. As to metal buckles, the shoemaker would punch the holes through which the buckle could be passed, but the actual purchase and attachment of the buckle was up to the customer. A well-trained shoemaker could complete a pair of shoes in 8-10 hours, i.e., one shoe per day.
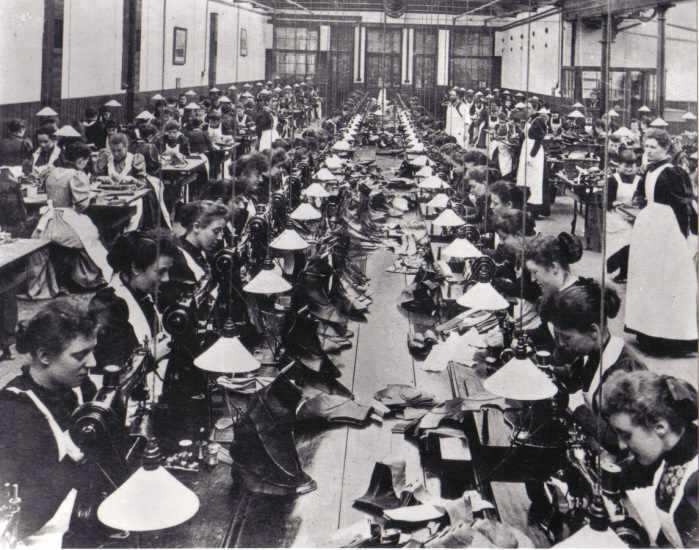
How well do you think a production capacity of 1 shoe per day would compete with the production capacity shown at the left? Shoemaking factories like this one started becoming common in the late 1800s. The women in this picture are Closers. They are making the upper parts of a shoe by sewing together leather shapes. All Closers were traditionally women because sewing was seen as a woman's job. The two standing women with the white aprons were supervisors.
Sources
Various websites, including:
Interactive Shoe Factory: http://www.learnwithmuseums.org.uk/museums/northants_museums/resources/interactive_shoe.html
The Northhampton Shoemaker: http://www.learnwithmuseums.org.uk/museums/northants_museums/resources/the_northampton.html
The Shoemaker: http://www.motherbedford.com/Shoemaker.htm
The Shoemaker: http://museepaysderetz.com/anglais_musee_cordonnier.html
Shoemaker: http://www.history.org/history/teaching/shoemkr.cfm
The Shoemaker's Workshop: http://www.learnwithmuseums.org.uk/museums/northants_museums/resources/shoemakers.html
Shoemaking (Wikipedia): http://en.wikipedia.org/wiki/Shoemaking
Training boys in an institution: http://www.learnwithmuseums.org.uk/museums/northants_museums/resources/training_boys_in.html